007 First Light hides 23 MI6 Intel across its 17 chapters, narrative documents that flesh out the game’s lore on characters, organisations and missions. Some are tucked behind safe codes or require distracting a guard, here is where to find every file and how to crack the trickiest ones.
MI6 Intel is one of the five collectible categories in the game alongside playing cards, Mementos, Postcards and Legacy Items. Each file is a unique narrative document picked up in-mission, which then joins the collection accessible from the Touchpad menu and adds context to the game’s universe. They show up in-game as Intel when you grab them, while the achievement description uses the MI6 Files label, but they are all the same collectible.
Grabbing all 23 MI6 Intel unlocks the For Your Eyes Only trophy (among the 37 achievements to unlock). Nothing is missable thanks to Chapter Select, which lets you jump back to any checkpoint. Files save the moment you pick them up, so you can quit out immediately without finishing the level if you are doing a focused cleanup run.
The HUD provides no per-chapter tracker, only a global counter by collectible type. Keep this guide open while playing to track what you have already grabbed. You can also use the Laser gadget on the Q-Watch picked up in Chapter 4 to scan for collectibles, which highlights them in yellow in the environment.
All 23 MI6 Intel Locations
The 23 MI6 Intel are split across 12 different chapters, with a heavy concentration in Uninvited, Knightfall and Time to Die which all pack 3 each. IO Interactive left some sitting in plain sight during main missions and others tucked behind safe codes or distraction sequences, here is the exact location of every single one.
Chapter 4 - The Heart of the Matter
The very first chapter with collectibles hides 2 files, both located inside the Q-Lab during your first visit to Q:
Workshop Notice (Selina Tan) -> The file sits on the cupboard in the back right corner of the Q-Lab where two scientists are talking. Head straight to that corner before speaking with Q to grab it.
Recruit Stats (00 Recruits) -> The file waits on the laptop behind where you first found Q. Interact with it only after the Q-Watch tutorial cutscene, otherwise the prompt does not appear.
Chapter 5 - A New Home
This quiet home chapter hides 2 personal files picked up directly while following the visit objectives:
Family Photo (Lennox Monroe) -> The file rests on the cupboard in the right corner of the living room. Walk straight forward when you arrive at your new home.
Dress Box (Cressida Bright) -> The file sits inside the gift box on Cressida’s bed. Follow the main objective to the end of the hallway to enter her bedroom.
Chapter 7 - A Matter of Considerable Delicacy
The 2 files in this chapter are tied to Moneypenny and her secondary target, picked up on the Operations floor:
Arrowhead Report (Arrowhead) -> The file sits on the desk in the middle of the floor after taking the elevator up to Moneypenny. Turn around in the opposite direction of the main objective.
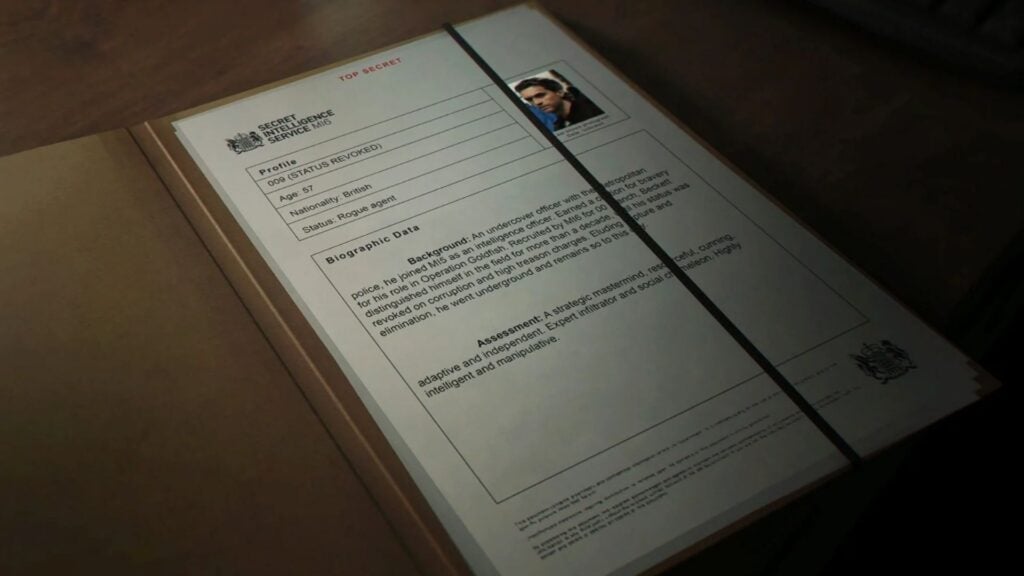
009 Profile (009) -> The file waits on Moneypenny’s desk when you arrive for the briefing. Grab it as soon as you enter her office.
Chapter 9 - Out of the Ashes
A single file for this chapter, picked up behind the Operations elevator:
Facial Composite (Niko and Tero Murto) -> The file sits on the back left cabinet behind the elevator. Once you take the elevator up to Operations to talk to Moneypenny, walk around behind the elevato
Chapter 10 - The Past Never Dies
This chapter packs 2 files, one in the black market and one on a crime scene you need to explore in detail:
Delivery Box (Bawma) -> The file sits on a market stall in the back left corner, left of the shooting range. From the black market entrance, head toward the back.
Photo of Greenway (John Greenway) -> The file is on the left cupboard in the room at the end of the crime scene. Follow the investigation objective to the final room.
Chapter 11 - Uninvited
The gala chapter hides 3 files including the Webb Industries Press Pack which requires distracting a guard with the fusebox to slip past a restricted area:
Bond Family Photo (James Bond) -> The file sits on the nightstand to the right of the bed in Bond’s room. Enter his room by following the main objective.
Webb Industries Press Pack (Webb Industries) -> The file waits next to the guard in the restricted section of the press room. Immediately turn left when entering the gala room, trigger the fusebox in the right corner to distract the guard then bluff the woman before grabbing it.
Security Notice (Stephen Bright) -> The file sits on the table in the front right room of the security area. Enter the CCTV room then the door at the front right.
Chapter 12 - Knightfall
With 3 files on the docket, this chapter requires several detours including the first floor bathroom to grab the office key:
Wooden Spoon (Roger Finch) -> The file sits on a stand to the right of the office labeled R. Finch. After Greenway boosts you up to the statue, jump to the next balcony, shimmy left over the railing and climb through the window, head downstairs and kick down the left stall in the bathroom to grab the office key.
Employment Contract (Isola Vale) -> The file waits on the desk of the office accessible through the ceiling vent. Once in the corridor with the lasers, push the obstacle out of the way then go straight through the vent (not the left exit).
Psych Profile (Damien Webb) -> The file sits on the shelf in the back right corner of the penthouse. Grab it while looking for the main safe.
Chapter 13 - Going Old School
A single file for this chapter, sitting in plain sight as soon as you meet Q:
Driving Gloves (Q) -> The file rests on a desk to the right when you meet up with Q. Just grab it as you walk into the room.
Chapter 14 - Time to Die
This chapter concentrates 3 files including one easy to miss on the ground right after a cutscene and another after the bowtie QTE sequence:
Keynote Presentation (Theresa Lorca) -> The file sits on the ground at your feet, in front of the pool. Grab it immediately after the cutscene with Theresa Lorca.
Caliban Profile (Caliban) -> The file waits on the living room table. After the QTE sequence where you tie your own bowtie, head to the living room.
Gun Case (Riptide) -> The file rests on a wooden coil on the right after you get freed from the handcuffs. Grab it while pursuing Damien.
Chapter 15 - Man of the Hour
A single file but the trickiest in the game, locked behind a scanned door and a code-protected cabinet:
Q’s Photo (Rhys Beckett) -> The file sits inside the locked cabinet of Q-03 Stress Testing, opened with code 4397 (the license plate of the car in the test chamber). Use a gadget first on the fire extinguisher above the door scanner to get inside.
Chapter 16 - Wave of the Future
The 2 files in this chapter are concentrated on the Operations floor that you visit during the main mission:
M Profile (M) -> The file sits on the desk inside the Security Office where you upgrade your ID bracelet.
Webb’s Manuscript (Sir Nicholas Webb) -> The file waits on the chair on the rock, next to the cat statue you need to turn to progress. Grab it before interacting with the statue.
Chapter 17 - For England
The final chapter hides a last file on the route to THEIA, in the service tunnels after taking out two snipers:
Wallet (Eve Moneypenny) -> The file sits on the ledge straight ahead as you go through the fan. After defeating the two snipers, enter the service tunnel, use the wall panel to switch off the fan then crawl through. Grab it before climbing down the ladder.
Founder of Retrogems.fr, Ric covers the gaming industry with a critical eye. Specialized in releases, DLCs and trailers, he breaks down market trends and studio strategies.


Comments
Log in to comment
Continue with GoogleBe the first to comment on this article!